
Three "Must-Try" Snow Sensory Activities: Sensory Play Tutorials
- Gina
- Jan 1
- 3 min read
Updated: Jan 4
In this BLOG post I will teach you how to make three different snow sensory set-ups and share free printable activity cards.

There’s something magical about bringing “snow” indoors, especially when it’s soft, squishy and super engaging!
Whether you’re planning a cozy snow‑day activity, a winter‑themed sensory party, or just looking to spark a little seasonal wonder, these three simple set‑ups deliver big engagement with minimal prep.
Each one uses easy pantry or household ingredients, and they all invite scooping, squishing, molding, mixing, and imaginative play.
Why you will LOVE these sensory set-ups:
They are simple to make and only require a few ingredients
They support fine motor development and provide incredible ways to strengthen fingers and hands
They provide opportunities to enhance language development (cold, build, smoosh, scoop, crumble etc)
They encourage independent, creative, hands-on playtime
You are going to have SNOW much fun!!
Check out our E-Book: A Complete Guide to Sensory Play HERE! This Guide was created specifically to provide meaningful sensory-play opportunities for your child or student. Through those opportunities, they will strengthen fine & gross motor skills, enhance opportunities to develop language & vocabulary & practice important social skills.
SNOW DOUGH
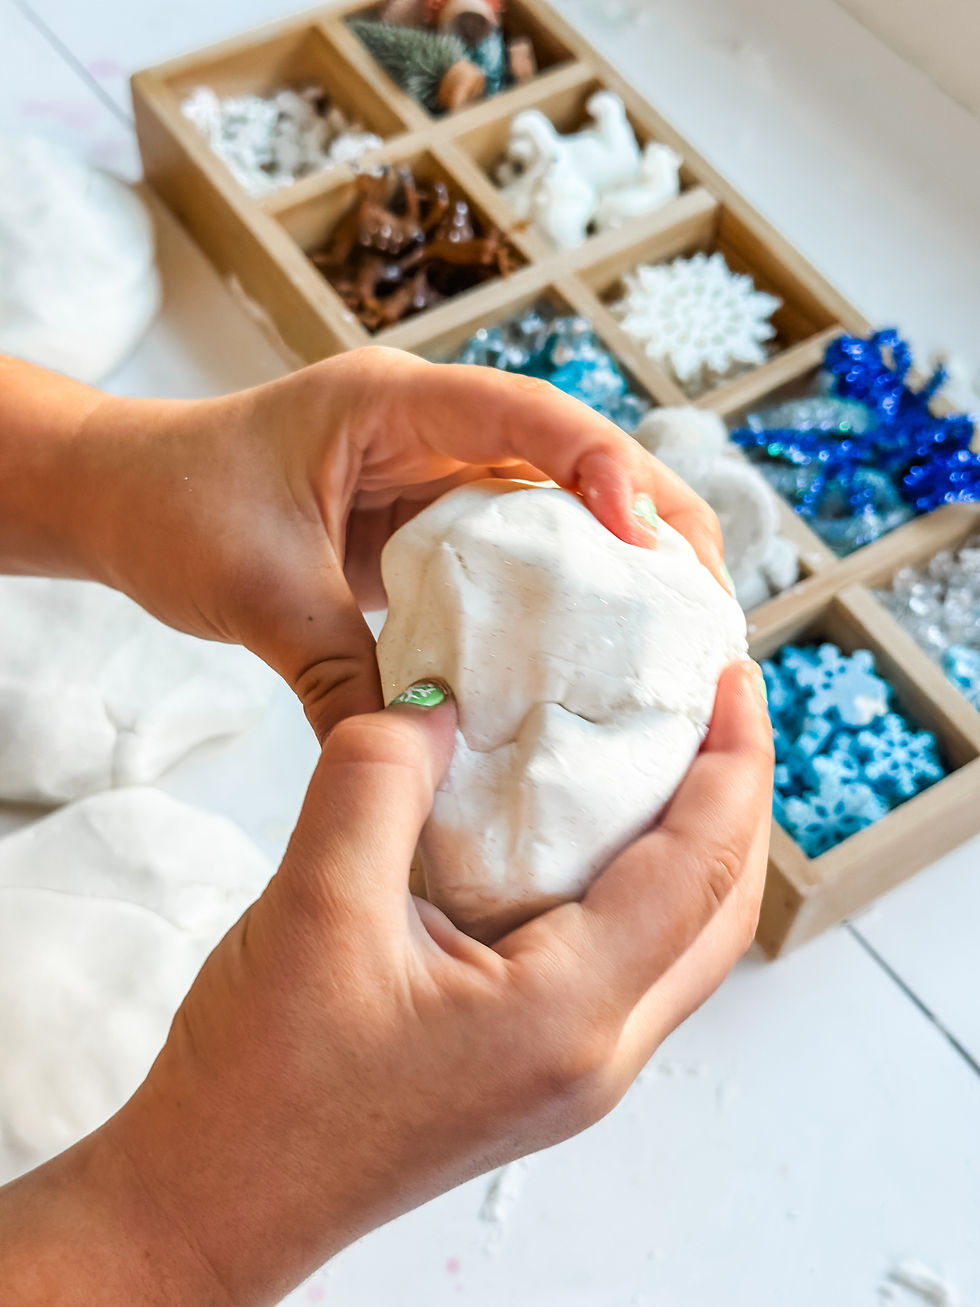
Materials:
Cornstarch
Hair conditioner or lotion
Mixing cup
Bowl
Spoon
Sensory tray or bowl
Any tools or trinkets you'd like
Step 1: Measure and pour (1) cup of conditioner or lotion into the bowl.
Step 2: If you are adding food coloring or glitter, mix it in now.
Step 3: Pour in (2) cups of cornstarch.
Step 4: Mix all of the ingredients until fully incorporated. After you mix your dough, it may still look a bit crumbly. Here's where your hands get a workout! Take the mixture out & knead it. The more you squish & squeeze & smoosh the dough, the softer it gets! As all of the ingredients blend together, the dough becomes silky soft, easy to mold & perfect for little hands.
Step 5: Place it on your sensory tray or bowl, add in your favorite tools and trinkets and PLAY!
Do you want a FREE printable activity card for snow dough? Click HERE!
Two-Ingredient SNOW Sensory Set-Up

Materials:
(2) cups Baking Soda
(2) cups shaving cream
Sensory bin or bowls
Spoon
Scoops, bowls, trinkets etc
Step 1: Pour baking soda and shaving cream into a tub or tray and mix well.
Step 2: Add in your favorite scoops or bowls and PLAY!!
Make observations as you play:
How does it smell?
How does it feel?
What does it look like as it dries?
If it feels too sticky, add more baking soda. If it feels too dry, add more shaving cream!
Want to check out three other SNOW recipes? Check them out HERE!
Want to download a FREE activity card? Download it HERE!
Fluffy SNOW Paint

Materials:
White liquid glue
Shaving cream (foam, not gel)
White cardstock, construction paper OR cardboard
Small bowl
Paintbrush
Construction paper: optional to create the hat, eyes, nose, arms and buttons
Optional: glitter, buttons, pom-poms, scarves cut from paper
Step 1: Mix the Puffy. In a bowl, combine equal parts white glue and shaving cream. Gently stir until fully mixed. The texture should be fluffy, not runny.
Step 2: Paint the Snowman. Use a paintbrush or spoon to spread the puffy paint onto paper in the shape of a snowman—three stacked circles work perfectly.
Step 3: Add Texture. Let kids dab and swirl the paint to create a snowy, bumpy texture. Sprinkle on glitter if desired.
Step 4: Dry Time. Allow the artwork to dry completely (usually a few hours or overnight). The paint will puff up as it dries.
Step 5: Decorate. Once dry, add eyes, a carrot nose, buttons, and arms using paint, markers, or craft materials.
Want a FREE printable Puffy Snowman Paint activity card? Download ours HERE!
You get to decide what is safe and manageable in your home. Always monitor young children.
Want more SNOW activities? Check these out:


Love this !!!