


11 Playful Name Writing Activities for Preschoolers
Looking for name writing activities for preschoolers that feel like play? Start with materials your child can touch, move, build, and explore. A cotton swab, a few blocks, or a ball of play dough can turn name practice into a meaningful invitation to learn.

There is something pretty special about learning to write your own name. Those letters belong to YOU!
But getting there takes practice, and there are so many playful ways to begin. Bring out the blocks, grab the dot stickers, roll some play dough, and let’s make name practice something your child wants to come back to.
These name writing activities for preschoolers are simple to set up with materials you may already have at home. They work well in the classroom, too!
What are children learning while they play?
So much is happening when children build, trace, and explore their names. They are noticing letters, figuring out which one comes next, and practicing the little hand movements they use for writing.
Some of these activities focus on recognizing and putting letters in order. Others give children a chance to practice forming the letters themselves. Both have a place in learning to write a name!
A child’s name is a meaningful place to start exploring print.
A few things to keep in mind:
Write your child’s name on a card so they have a model nearby. Use a capital letter at the beginning and lowercase letters after that, following your family’s spelling and capitalization.
If the whole name feels like a lot, start with the first letter. If your child wants to build every letter, go for it! Follow their lead, offer help when needed, and leave plenty of room for experimenting.
And remember: Body Before Brain! A little stretching, jumping, or pushing against the wall may help your child feel ready to join in. Choose what works for their body.
11 playful ways to practice your name
Q tip Tracing

Write your child’s name in large letters. Dip a Q-tip in washable paint and invite them to trace with little dots or strokes. A little paint goes a long way!
This gives children practice following letter shapes and controlling a small tool. Show them where to start and try one letter together if they need help.
Wikki Stix

Bend, press, and build! Write your child’s name on paper and invite them to place Wikki Stix along the letters. Look for straight lines and curves as you go.
Shaping the sticks gives little hands something to do while children take a closer look at how each letter is made.
Dot Markers

Write your child’s name in big letters and invite them to dot along each one. Follow the lines, go around the curves, and watch the name fill with color!
Dot markers offer a larger tool to hold while children practice aiming and moving along a letter’s shape.
Sticky Notes on Magnetic Tiles

Write one letter on each sticky note and attach them to magnetic tiles. Invite your child to connect the tiles to build their name, using a name card for help.
Building and rearranging gives children a hands-on way to explore letter order. Make sure you have a tile for every letter, including repeats!
Dot Stickers
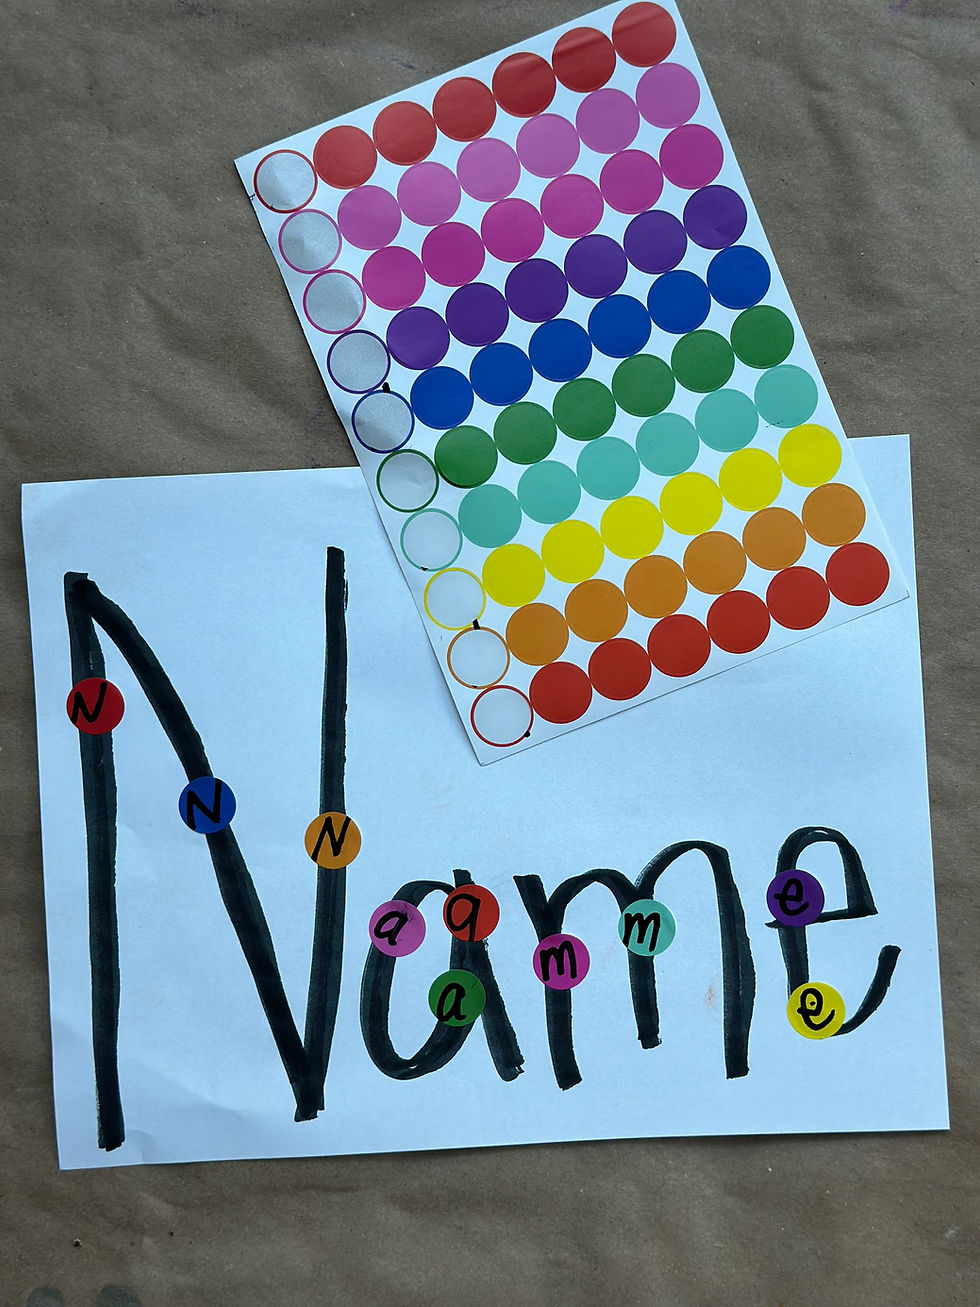
Write your child’s name in large letters, then peel and stick along the lines. You can also write letters on the stickers and invite your child to match them to the letters in their name.
All that peeling and placing gives fingers plenty of practice. Add letter labels when your child is ready for a matching challenge.
Blocks

Add a letter to each block with a removable label. Use a name card or write the name on a base block, then invite your child to build it. Take it apart and build it again!
This brings letter matching and sequencing into a familiar favorite: building. Point to each letter as you read the name together.
Clothespins and Craft Sticks

Write your child’s name across a wide craft stick and put the matching letters on clothespins. Invite them to find, squeeze, and clip each letter into place.
Opening the clothespins gives hands a little workout while children match letters. If squeezing is tricky, try easier clips or help open them together.
Trace to Erase
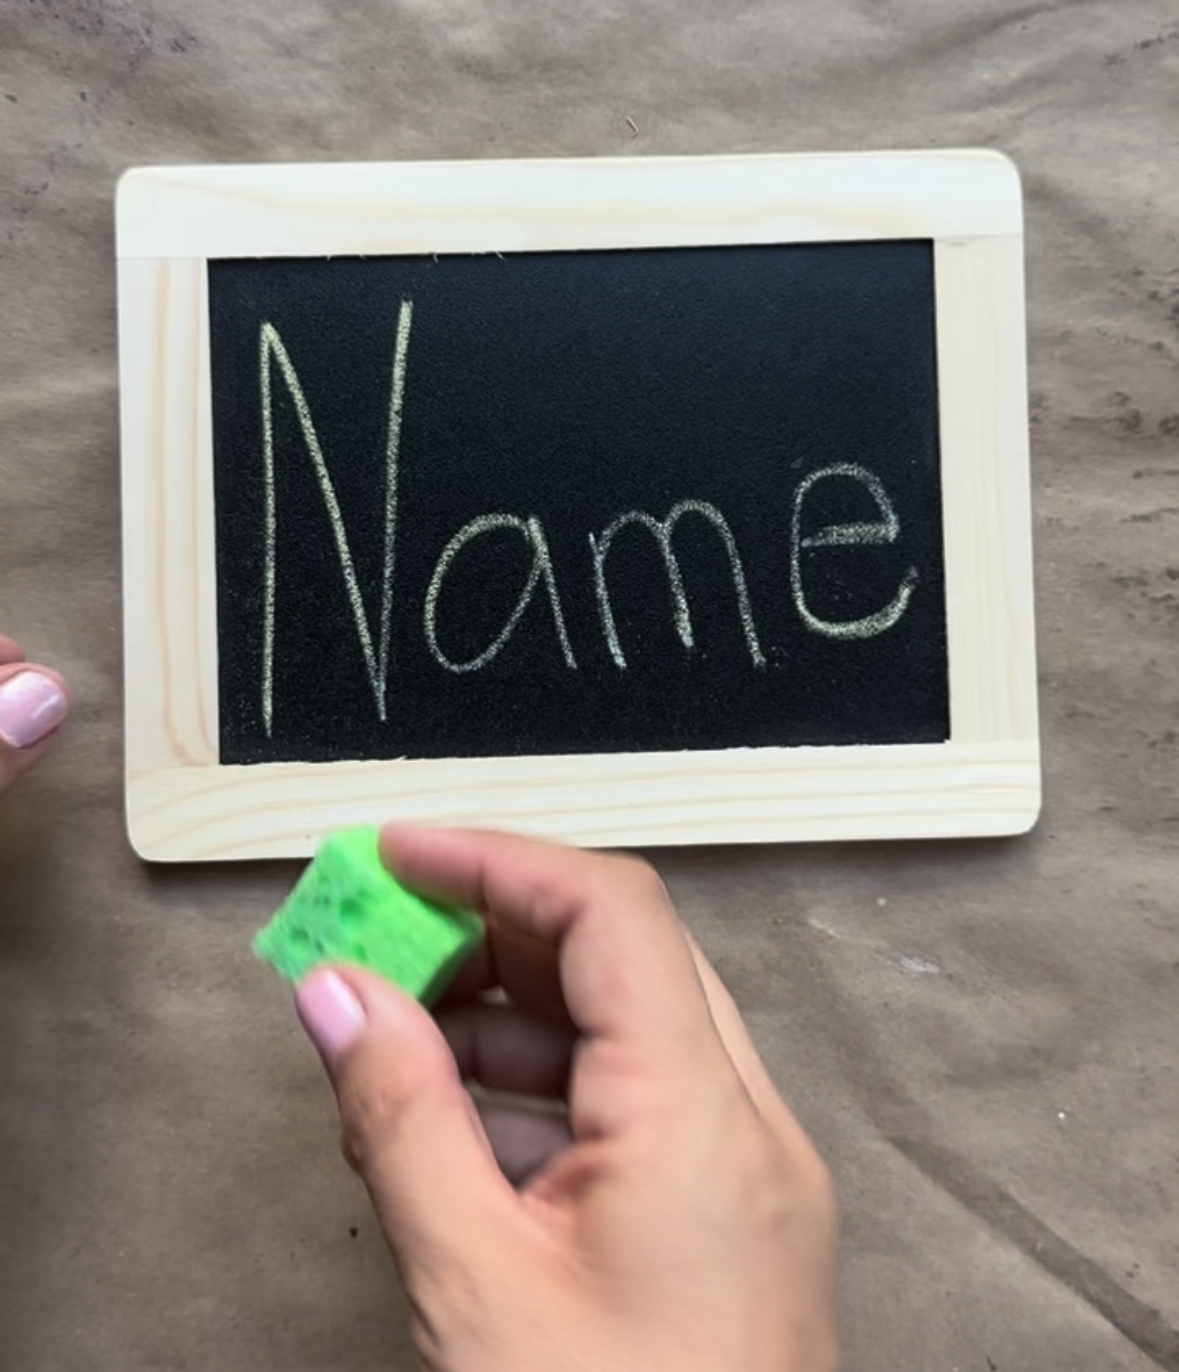
Write your child’s name in chalk. Give them a small damp sponge or Q-tip and invite them to trace the letters until they disappear. Write it again for another turn!
Following the letters gives children practice with their shapes and movements. And sometimes erasing is the best part!
Craft Stick Name Puzzle

Line up wide craft sticks and write your child’s name across them. Mix them up, then invite your child to put their name back together. Keep a name card nearby for a little help.
This is a simple way to practice looking closely, solving a puzzle, and putting letters in order. Make it easier by placing one whole letter on each stick.
Letter Bead Threading

Gather the beads for your child’s name and invite them to thread the letters onto a cord. Use a name card to check what comes next.
Threading gives children practice using both hands together: one holds the bead while the other guides the cord. They are building their name as they go!
Play Dough

Roll little ropes of play dough, then bend and join them to make the letters in your child’s name. Build right on top of a name card or place the letters beside it.
Rolling, pinching, and shaping keeps hands busy while children explore letters. Start with one letter or make the whole name—there is plenty of room to play!
More Name Practice Ideas to Try:
Salt tray writing: Add a thin layer of salt to a tray and write with a finger or dry paintbrush. A gentle shake makes room to try again! This gives children practice making letter shapes with an easy reset.
Sidewalk chalk: Take name practice outside! Write big letters to trace or copy. The extra space lets children use larger arm movements.
Paint with water: Grab a paintbrush and a cup of water to write names on the sidewalk. Watch them dry and disappear! Children get practice moving a writing tool without much cleanup.
Letter hunt: Hide large paper letters around the room. Find the letters, then put them together to build a name. This adds movement to letter matching and sequencing.
Alphabet stamps: Find and stamp each letter of a name. Stamps let children put their name on paper while they are still learning to form letters themselves.
Tape letters: Make a large first letter with painter’s tape on the floor. Drive a toy car along it or walk the path. This is a fun way to notice a letter’s shape through movement.
Pretend play sign-in: Going to the pretend doctor? Checking into a pretend hotel? Add a clipboard and invite your child to sign in. Scribbles, a first letter, and full names are all welcome. Writing has a purpose in the play!
Sign artwork and cards: Invite your child to add their name to a picture or a card for someone they love. Offer a model if they want one. This gives them a real reason to use their growing writing skills.
Keep it Playful
You do not need to try every idea or make name practice a big project. Choose one, put out a few materials, and see what your child does with them.
Offer choices: “Do you want to build your name or paint it?” Notice their efforts: “You found your first letter!” And when they are interested, invite them to copy a letter or try writing their name beside the model.
Make the activity work for your child. Bigger letters, larger pieces, easier clips, or a thicker tool can help. Children with disabilities can join in through adapted tools, choosing or pointing to letters, or telling an adult where to place them.
Use age-appropriate materials and supervise play. Small beads and other small pieces are not suitable for children under 3 or children who mouth objects. Choose larger alternatives and use only intact magnetic tiles.
The goal is for your child to feel proud of what they can do and curious enough to try again. Save these ideas for your next invitation to play!
Looking for more ways to learn + play at home? Explore our at-home, play-based preschool curriculum—filled with hands-on activities to help your child learn through play!
Check it out HERE.


Comments